Pages

Friday, January 21, 2011

Using BackgroundWorker Component

I'll probably start every next post with this...

In my own words:
The BackgroundWorker component is an easy way of using threading. It gives you some events so that you can easily control your execution flow (progress, cancellation, etc). And, as who knows a little bit of threading already knows, it manages to keep your UI responsive while performing lengthy and time consuming operations on the background. It is somewhat of a wrapper, so you can use threading and report the progress withouth even putting much thoughts on it...

In MSDN's words:
The BackgroundWorker class allows you to run an operation on a separate, dedicated thread. Time-consuming operations like downloads and database transactions can cause your user interface (UI) to seem as though it has stopped responding while they are running. When you want a responsive UI and you are faced with long delays associated with such operations, the BackgroundWorker class provides a convenient solution.


I'll use a simple form with a progress bar, two buttons and a BackgroundWorker, so the form will look like this:


Working the Worker

For this example, it's important to have the Asynchronous properties set to true, like the image below:


The properties' names are self-explanatory.

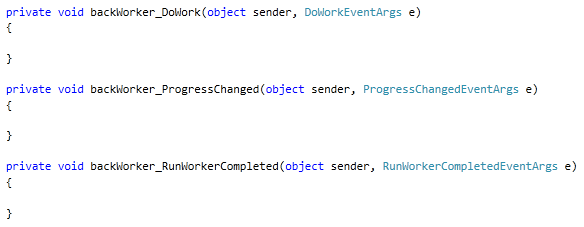
As for events, we have three of them:

  • DoWork:
    This is the main execution entry point. This is where you should put your asynchronous code, or your asynchronous entry method call.


  • ProgressChanged:
    This event does the progress reporting. If you want to report your progress on a progress bar, for example, this is where you should set its progress value.


  • RunWorkerCompleted:
    Self explanatory. Execution falls here right after work is completed, so that you can do any clean up, display any messages, etc.


  • Stating that, generate the event handlers:


    Properties:

    Code:


    To start running our example, we'll call method RunWorkerAsync inside Button Start's Click Event Handler:

    private void btnStart_Click(object sender, EventArgs e)
    {
        if (!backWorker.IsBusy)
        {
            backWorker.RunWorkerAsync();
        }
    }
    

    If you don't plan on disabling your start button or preventing the user from starting the operation again, you should put the check above. Property IsBusy returns us a boolean indicating if the BackgroundWorker is currently performing any background operation. If it is, and we call RunWorkerAsync again, it'll throw us an Exception of type InvalidOperationException with message "This BackgroundWorker is currently busy and cannot run multiple tasks concurrently.".

    Calling method RunWorkerAsync will execute whatever's inside the DoWork Event Handler, asynchronously. At this point, execution will already be in another thread.

    So let's put some dummy loop inside it just so it keeps looping for a while:

    private void backWorker_DoWork(object sender, DoWorkEventArgs e)
    {    
        for (int i = 1; i <= 100; i++)    
        {
            System.Threading.Thread.Sleep(500);
        }
    }
    

    Now assume that you want to report execution progress on that. The BackgroundWorker component gives us the method ReportProgress. We'll use the simple overload, which takes an integer value from 0 to 100 (0% to 100%), and raises the ProgressChanged event. Our code here will look like this:

    private void backWorker_DoWork(object sender, DoWorkEventArgs e)
    {
        for (int i = 1; i <= 100; i++)
        {
            System.Threading.Thread.Sleep(500);
            backWorker.ReportProgress(i); // Don't forget that i represents a percentage from 0 to 100.
        }
    }
    

    And inside the Event Handler ProgressChanged, we'll set the progress bar's value to the value that we passed as a parameter when we called the method ReportProgress:

    private void backWorker_ProgressChanged(object sender, ProgressChangedEventArgs e)
    {
        progressBar.Value = e.ProgressPercentage; // Percentage value comes on ProgressChangedEventArgs
    }
    

    If we run our project here, we'll see the progress of execution on the progress bar. But what if we want to cancel it?BackgroundWorker has a readonly property named CancellationPending, and a method named CancelAsync. As you could already figure out, when we want to cancel an asynchronous operation, we call method CancelAsync and it'll set the CancellationPending property to true. We can then check if it's true everytime we reach a point in our code where we can actually cancel the operation.Call CancelAsync inside Button Cancel's Click Event Handler:

    private void btnCancel_Click(object sender, EventArgs e)
    {
        backWorker.CancelAsync();
    }
    

    Check the property CancellationPending on every iteration on our loop:

    private void backWorker_DoWork(object sender, DoWorkEventArgs e)
    {
        for (int i = 1; i <= 100; i++)
        {
            if (backWorker.CancellationPending)
            {
                e.Cancel = true; // Here we're letting the Worker know that we're cancelling our operation
                return;
            }
            else
            {
                System.Threading.Thread.Sleep(500);
                backWorker.ReportProgress(i);
            }
        }
    }
    

    Notice that we set a property on DoEventArgs to true. We do that to indicate that the operation has been canceled when execution reaches our next event handler, RunWorkerCompleted. As we call return, execution will leave DoWork and fall into RunWorkerCompleted, where we can display any messages, or do some cleanup:

    private void backWorker_RunWorkerCompleted(object sender, RunWorkerCompletedEventArgs e)
    {
        if (e.Cancelled) // Remember that we've indicated cancellation on DoWork?
            MessageBox.Show("User cancelled execution");
        else
            MessageBox.Show("Execution completed successfully");
    }
    

    So that's basically it. This is a simple way of using BackgroundWorker, just to show you how powerful it is. It literally simplifies using threading. Hope you like it.

    Friday, January 7, 2011

    Using Isolated Storage

    Once again, first we have to understand what it is and how it works.

    In my own words:
    It is a folder in Windows' File System where you can securely store data for your applications. You would, for example, want to store data in Isolated Storage for a small application which you don't want to have to use a Database, or a .config file. In addition to that, the user won't see the data being stored, it won't ask for any permission or anything like that. Another great thing is that Isolated Storage can be divided by machine's users, which means that each user will have their own configuration for your application. It can also be divided by users and applications, or by users and assemblies.

    In MSDN's words:
    Isolated storage is a data storage mechanism that provides isolation and safety by defining standardized ways of associating code with saved data. Standardization provides other benefits as well. Administrators can use tools designed to manipulate isolated storage to configure file storage space, set security policies, and delete unused data. With isolated storage, your code no longer needs unique paths to specify safe locations in the file system, and data is protected from other applications that only have isolated storage access. Hard-coded information that indicates where an application's storage area is located is unnecessary.


    That pretty much covers it. Following what I said, let us declare a configuration class and serialize it to the Isolated Storage. Here's our configuration class:

    [Serializable] // This is not really needed for XML Serialization: it will serialize without it
    public class Config
    {
        public string InitialDirectory { get; set; }
        public bool StartActivated { get; set; }
        public string WarningMessage { get; set; }
        public int ExpireTime { get; set; }
    }
    

    I am assuming we will serialize all of its members.

    Working with Isolated Storage is pretty straight-forward. The two key classes are IsolatedStorageFile which represents the Isolated Storage and IsolatedStorageFileStream, which is literally a stream.
    Using both of them, with the following code we can serialize our Config class to Isolated Storage, as a XML:

    using System.IO;
    using System.IO.IsolatedStorage;
    using System.Xml.Serialization;
    
    
    // First we fill our config fields:
    Config config = new Config();
    config.InitialDirectory = @"C:\Temp";
    config.StartActivated = true;
    config.WarningMessage = "Don't do that again!";
    config.ExpireTime = 90;
    
    // Now let's get a reference to the Isolated Storage:
    IsolatedStorageFile isolatedStorageFile = IsolatedStorageFile.GetUserStoreForApplication(); // You may get an exception here, I'll talk about it below
    isolatedStorageFile.CreateDirectory("MyDir"); // If you will
    
    // Our Stream to Isolated Storage:
    IsolatedStorageFileStream isolatedStream = new IsolatedStorageFileStream(@"MyDir\config.xml", FileMode.OpenOrCreate, isolatedStorageFile); // Pass FileMode as OpenOrCreate so you won't get an exception if the file already exists, nor will you have to check for it
    
    
    // Serializing it:
    XmlSerializer xmlSerializer = new XmlSerializer(typeof(Config));
    
    xmlSerializer.Serialize(isolatedStream, config);
    
    // Now flush our Isolated Stream:
    isolatedStream.Flush();
    isolatedStream.Dispose();


    So you have your Application's Configurations serialized to Isolated Storage, divided by user.
    This way you can deserialize it and apply it to your application, like this:

    using System.IO;
    using System.IO.IsolatedStorage;
    using System.Xml.Serialization;
    
    IsolatedStorageFile isolatedStorageFile = IsolatedStorageFile.GetUserStoreForApplication();
    IsolatedStorageFileStream isolatedStreamOpen = new IsolatedStorageFileStream(@"MyDir\config.xml", FileMode.Open, isolatedStorageFile); // Here FileMode has to be Open
    XmlSerializer xmlSerializer = new XmlSerializer(typeof(Config));
    
    Config config = (Config)xmlSerializer.Deserialize(isolatedStreamOpen);
    
    // Then you can distribute your configurations across  your application


    About that exception I said you might get, exception of type IsolatedStorageException, with message "Unable to determine application identity of the caller.". This means that your application is not enabled for ClickOnce security settings. This allows your application to use Isolated Storage, and some other stuff.

    Editing: If you plan on running your application as a simple .exe file, without having to install it, the method GetUserStoreForApplication() won't be good. It only 'lets' you access Isolated Storage after the application is deployed, installed, and not as a single .exe file. It WILL work if you run it through Visual Studio though. So be careful here. As an alternative, use method GetUserStoreForDomain().


    To activate ClickOnce Security Settings, do this:
    • Right click your project, and select Properties
    • Go to the security tab
    • Check the option "Enable ClickOnce Security Settings"

    Doing this prevents the exception from happening.

    Again, hope it helps.