Pages

Friday, December 23, 2011

Post or Validate Invent Journal

When you want to post an Invent Journal through code, you can use the class InventJournalCheckPost, like this:


static void Job1(Args _args)
{

    InventJournalCheckPost      inventJournalCheckPost;
    InventJournalTable          inventJournalTable;
    ;


    inventJournalTable = InventJournalTable::find("MyJournalID");

    
    inventJournalCheckPost = InventJournalCheckPost::newPostJournal(inventJournalTable);
    inventJournalCheckPost.parmThrowCheckFailed(true);

    try
    {

        inventJournalCheckPost.run();
    }
    catch
    {
        info("An error has occurred, journal not posted.");
    }
}


When setting parmThrowCheckFailed to true, when the journal fails to be posted by any reason, Dynamics AX will throw an error with the error message. If you don't, it will simply show the error message on the infolog, but, technically, you wont know wether it posted successfully or not, so it depends on what you're trying to do. This is specially useful when you're working with transactions and depend on the journal being posted successfully to continue with your code or to abort everything.


If you're simply trying to Validate (Check) an Invent Journal, all you have to do is change which constructor you'll use for the class InventJournalCheckPost, like this:


static void Job1(Args _args)
{

    InventJournalCheckPost      inventJournalCheckPost;
    InventJournalTable          inventJournalTable;
    ;


    inventJournalTable = InventJournalTable::find("MyJournalID");

    // Constructor to just check the journal:
    inventJournalCheckPost = InventJournalCheckPost::newJournalCheckPost(JournalCheckPostType::Check, inventJournalTable);
    inventJournalCheckPost.parmThrowCheckFailed(true);

    try
    {

        inventJournalCheckPost.run();
    }
    catch
    {
        info("The journal contains errors.");
    }
}


And all the other classes for Journals go with the same base, so for example, for a Production Journal, the correct class to perform checking or posting is ProdJournalCheckPost. That is because all of them inherit from JournalCheckPost or JournalCheckPostLedger (which inherits from JournalCheckPost).


So that's it, that's how you post or check a journal with code.


Wednesday, November 16, 2011

ASP.NET 4.0 has not been registered on the Web server.


ASP.NET 4.0 has not been registered on the Web server.
You need to manually configure your Web server for ASP.NET 4.0 in order for your site to run correctly.


If you ever come across this warning message when creating a new Web Application or configuring your Web Site to be hosted directly on IIS instead of Visual Studio's Development Server, simply run the regiis util, inside the correct Framework's version installation folder, with Administrator privileges, like this:


That should solve it.

I'm not sure but I think this happens when you install the .NET Framework before you install IIS. If it happens with other versions of the .NET Framework, you should simply switch its folder to the correct version.


Here's the text:
cd C:\Windows\Microsoft.NET\Framework\v4.0.30319
aspnet_regiis -i

Wednesday, July 6, 2011

Handling null values with bound RadioButtonList

Sometimes when you're binding a RadioButtonList and there's a null value in one of the records, you can end up getting an exception thrown. The problem here is that it tries to select a ListItem that has the same value as the record retrieved from the database, in this case, null.

There are plenty of workarounds for this issue, including changing your query to don't retrieve nulls, or using a COALESCE instead, for example. In this post, I'll show a simple trick to handle this.


Binding to nothing

As I said, the big secret is to have a ListItem with the same value retrieved from the query. If your retrieved value is NULL, your ObjectDataSource will convert it to an empty string automatically, so you'd only need to have a ListItem with an empty string marked to be its value, like the following:

<asp:RadioButtonList runat="server" ID="radioButtonList1" SelectedValue='<%# Bind("NullableColumn") %>'>
    <asp:ListItem Text="MyEmptyStringOption" Value=""/>
    <asp:ListItem Text="MyOption1" Value="1" />
    <asp:ListItem Text="MyOption2" Value="2"/>
    <asp:ListItem Text="MyOption3" Value="3"/>                    
</asp:RadioButtonList>


By doing that, when bound, the selected option will appear as the EmptyStringOption, so we have already prevented that Exception from happening. But what would we write to the empty string option text? "None"? It makes no sense having an option that says None on the screen, right?

So let's hide it. That way, we'll always have at least one option selected, even if the return value is null, but the user will only see the options with an actual value, making it look like the RadioButtonList has no selected option at all.

If you check ListItem's attributes, you'll see that it does not have a Visible attribute, so we're going to hide it through CSS. Even if it had a Visible attribute, if we'd set it to "False", the ListItem wouldn't even be rendered, causing the exception to return to happen, as we wouldn't have an option with an empty string value.


To hide it, simply add the style attribute to it, like this:

<asp:ListItem Text="MyEmptyStringOption" Value="" style="display: none;" />


But now you'll see something else. Even if not instantly, the compiler might show you a warning message, telling you that element ListItem does not have a 'style' attribute even though it works perfectly fine. If that warning message annoys you enough to make you want to get rid of it like it does to me, remove the style attribute from the ListItem, and add it programmatically on the Page's Load event, like this:

protected void Page_Load(object sender, EventArgs e)
{
    // First find the ListItem in question, and then add the style attribute to it
    MyRadioButtonList.Items.FindByValue("").Attributes.Add("style", "display: none");
}


This will have the same effect, and it will not show you that warning...

Monday, June 20, 2011

Implementing a ModalPopupExtender

It should be easy, but as I've encountered some problems along the way, I thought I'd best blog about it.


AjaxToolkit has an extender to make it easier for us to implement a modal dialog (or a Popup) for our ASP.NET Web Forms, the ModalPopupExtender. It could be used for confirmations, when a user choses to delete something, for example. I'll demonstrate a simple Popup with two options, and two buttons.


From now on I'll assume you have AjaxToolkit controls added to your toolbox. If you don't, you can go ahead and find out how to do it here.


Poping it up


After you've added AjaxToolkit to your toolbox, add a new WebSite to your solution, and open the default page code.

First of all, let us define our Popup's style:

.ModalPopupBackground
{
    background-color: Gray;
    filter: alpha(opacity=70);
    opacity: 0.7;
}

.PopupBody
{
    border: 1px solid silver;
    padding: 5px;
    background-color: #f5f5c5;
    text-align: left;
    font-size: 15px;
    color: Gray;
}        

This will add a Gray background when the Popup is active, and our PopupBody class will be defined to be our Panel's Css Class, which will be shown inside our Popup.

We also have to register our AjaxToolkit DLL on the page, and add a ScriptManager, like this:

<%@ Register Assembly="AjaxControlToolkit" Namespace="AjaxControlToolkit" TagPrefix="ajaxToolkit" %>

<ajaxToolkit:ToolkitScriptManager runat="server" ID="manager1" />


Now we can add our controls to the page. Add a button, and a label to interact with the Popup, and our ModalPopupExtender. Just remember that these controls must be inside a tag form with runat="server".


<asp:UpdatePanel runat="server">
        <ContentTemplate>
            <center>
                <asp:Button Text="Click Me" ID="btnClickMe" runat="server" />
                <br />
                <asp:Label ID="lblResult" Visible="false" Text="" runat="server" />
                <ajaxToolkit:ModalPopupExtender ID="modalPopup" runat="server" TargetControlID="btnClickMe"
                    PopupControlID="pnlPopup" OkControlID="btnHidden" CancelControlID="btnHidden"
                    BackgroundCssClass="ModalPopupBackground" DropShadow="true" />
            </center>
        </ContentTemplate>
    </asp:UpdatePanel>

I don't think I need to explain the ModalPopupExtender's properties. They're very straight-forward, and you can also find their explanation at the ASP.NET Ajax page.


One thing to note here is that we've set the OkControlID and CancelControlID to a dummy, hidden button. We do that because if we set them to the right controls, no PostBack is fired, so no code-behind is executed. It would be OK for the Cancel button though, but as I was developing this example, when I had the CancelControlID property set to the actual cancel button, after I clicked it once I had to reload the page for the Popup to be shown again. So instead, I put some JavaScript code on the Cancel's button OnClientClick event to hide the Popup. This was the simplest workaround I could think of.


And now this is our panel, which will be displayed as the Popup:

<asp:Panel runat="server" ID="pnlPopup" CssClass="PopupBody">
        <asp:RadioButtonList ID="radioList" runat="server" >
            <asp:ListItem Text="Option 1" Value="1" />
            <asp:ListItem Text="Option 2" Value="2" />
        </asp:RadioButtonList>
        
        <br />
        <center>
            <asp:Button Text="dummy" ID="btnHidden" runat="server" Style="display: none;" />
            <asp:Button Text="Ok" ID="btnOk" runat="server" style="padding-right: 10px;" 
                onclick="btnOk_Click" />
            <asp:Button Text="Cancel" ID="btnCancel" runat="server" OnClientClick="$find('modalPopup').hide();" />            
        </center>
    </asp:Panel>

As I said, the cancel button has some JavaScript to hide the Popup when it's clicked.

You can also notice that our dummy button doesn't have its visible property set to false, instead we've hidden it through style marks. We did that because if we set it to not be visible through the Visible property, it won't even be rendered, so the Popup won't find it, and won't be shown. But hidding it through style marks does the trick, and makes it work just fine. So if your Popup is not being shown, check if your dummy button has Visible = false and change it to style marks, as display: none.


To complete the trick, we add some code to handle our button OK click event:

protected void btnOk_Click(object sender, EventArgs e)
{
    lblResult.Text = string.Format("You have selected option {0}", radioList.SelectedValue);
    lblResult.Visible = true;
}


So when the Popup is shown and the Ok button is clicked, a PostBack is generated and the Click event handler code is executed and the Popup is hid. And when the Cancel button is clicked, it does nothing but hide the Popup. If you would add some code-behind to it, it would also be executed though.


And that's it, you should now have a modal Popup with two Radio Buttons as options, an OK and a Cancel button, like the images below. Once again, hope this helps...


Monday, June 13, 2011

GridView with ObjectDataSource and Pagination

The title is self explanatory: I'm going to develop a GridView bound to an ObjectDataSource with pagination directly at the DataSource, not just on the Grid.


The difference of paginating directly on the data source and paginating at the Grid level, is that in the first case you'll only have the records that are shown in the grid loaded to memory. This means that for each page selected, the data source will get the next N results to be displayed. When you do that directly on the grid, every row will be loaded on the first fetch the data source will perform, and the grid will handle paginating and mantaining those records in memory for that.


First of all, let's create our table:


CREATE TABLE Customers
(
    CustomerId INT IDENTITY (1,1) PRIMARY KEY,
    FirstName VARCHAR(60) NOT NULL,
    LastName VARCHAR(60) NOT NULL,
    Age INT NOT NULL,
    Phone VARCHAR(8) NULL
)

Insert some data in it, about 15 Rows or so...


If you mark that the ObjectDataSource allows Paging (and you will), you have to implement a select method which takes two special integer parameters (startRowIndex and maximumRows) and a count method that returns an integer of how many records we have in our table. It's obvious enough that we need the count method to calculate how many pages we'll have, and the two special parameters to limit our result...

You could also change startRowIndex and maximumRows to whatever you'd like to with the properties StartRowIndexParameterName and MaximumRowsParameterName. However, if you change their names your select method must be changed too. You'll learn exactly why we need those parameters with the code below.


Now implement our Data Class, notice that I've created a constant called ConnStr just for demonstration purposes, you should get your Connection String from wherever you think is better.

[System.ComponentModel.DataObject(true)]
public class CustomerData
{

    [System.ComponentModel.DataObjectMethod(System.ComponentModel.DataObjectMethodType.Select, true)]
    public static DataTable GetCustomers(int maximumRows, int startRowIndex)
    {
        string strCommand = "SELECT * FROM ";
        strCommand += "(SELECT *, ROW_NUMBER() OVER (ORDER BY FirstName) as RowNum FROM Customers) as Sub ";
        strCommand += "WHERE RowNum BETWEEN @StartRow AND @MaximumRows";

        using (SqlDataAdapter sqlAdapter = new SqlDataAdapter(strCommand, new SqlConnection(CustomerData.ConnStr)))
        {
            using (DataTable dtRet = new DataTable())
            {
                try
                {
                    startRowIndex++;

                    sqlAdapter.SelectCommand.Parameters.Add("@StartRow", SqlDbType.Int).Value = startRowIndex;
                    sqlAdapter.SelectCommand.Parameters.Add("@MaximumRows", SqlDbType.Int).Value = (maximumRows + startRowIndex);

                    sqlAdapter.Fill(dtRet);

                    return dtRet;
                }
                catch (Exception)
                {
                    throw;
                }                   
            }                
        }
    }


    [System.ComponentModel.DataObjectMethod(System.ComponentModel.DataObjectMethodType.Select, false)]
    public static int GetCustomersCount()
    {
        using (SqlCommand sqlCommand = new SqlCommand("SELECT COUNT(*) FROM [Customers]", new SqlConnection(CustomerData.ConnStr)))
        {
            try
            {
                sqlCommand.Connection.Open();
                return (int)sqlCommand.ExecuteScalar();                    
            }
            catch (Exception)
            {                    
                throw;
            }
        }
    }
}


Take a better look at our SELECT command:

SELECT
    *
FROM
(
    SELECT
        *,
        ROW_NUMBER() OVER (ORDER BY FirstName) AS RowNum 
    FROM 
        Customers
) AS Sub
WHERE
    RowNum BETWEEN @StartRow AND @MaximumRows

Since our DataSource passes us "0" on StartRowIndex for our first page, we have to add 1 to it, because our column RowNum starts at 1. We then limit the records to start on StartRowIndex + 1 and end on MaximumRows + our StartRowIndex (already increased by one).

We can see that when we add our parameters to the SqlCommand object:

startRowIndex++; // Increment our start row number by one

sqlAdapter.SelectCommand.Parameters.Add("@StartRow", SqlDbType.Int).Value = startRowIndex;

sqlAdapter.SelectCommand.Parameters.Add("@MaximumRows", SqlDbType.Int).Value = (maximumRows + startRowIndex); // MaximumRow plus StartRowIndex is the number of our last row for the actual page

Ok, so after that we start designing our page's objects.

Heres our ObjectDataSource, with no big secrets:

<asp:ObjectDataSource 
    ID="dsCustomers" 
    runat="server" 
    TypeName="CustomerData" 
    SelectMethod="GetCustomers" 
    SelectCountMethod="GetCustomersCount" 
    EnablePaging="true"
/>

And this is our GridView, marked to auto generate our columns, just for demonstration purposes:

<asp:GridView
    ID="gridCustomers" 
    AllowPaging="True" 
    runat="server" 
    PageSize="5" 
    DataSourceID="dsCustomers"
    AutoGenerateColumns="true"
/>  

If you've done everything right, you should be good to go with an ugly ass GridView, showing a maximum of 5 rows on each page, ordered by our Customers' first name, like the images below:


Go on and customize the columns, add Insert / Edit / Delete functionality, and the grid's skin / theme.

Friday, May 6, 2011

Filtering a DataGridView

Been reading a lot of people getting confused about how to develop a filter to a DataGridView.

The easiest way to do that is to apply the filter to a BindingSource object, which will then modify the DataGridView to display the filtered result in it.

So, here's my example form design:


The only property I've changed on the designer on the DataGridView and the BindingSource is their names.
That ComboBox will let us decide which column we want to filter, with the TextBox's value. That CheckBox will indicate whether the filter is active or not.

A very easy way to implement a Live Filter

We'll implement a live filter, meaning the data will be filtered as the user types, instantly. Now, this kind of filter is pretty good for small data, small collections. Imagine instantly filtering 30000 records...

For our live filter, we'll assign each key control's event to the same handler, this way we'll have to write less code, it'll be easier.

Our DataGridView will have two columns, so here we throw in some sample data, and configure the comboBoxColumns items using an anonymous type, all inside our form's Load event:

private void FormTestGrid_Load(object sender, EventArgs e)
{
    // This prepares our data source and our grid:

    DataTable dt = new DataTable();

    DataColumn colName = new DataColumn("Name");
    DataColumn colPrice = new DataColumn("Price");

    dt.Columns.Add(colName);
    dt.Columns.Add(colPrice);

    dt.Rows.Add("Bike", 150.00);
    dt.Rows.Add("Helmet", 59.99);
    dt.Rows.Add("Shoes", 90.99);
    dt.Rows.Add("Shirt", 30.00);
    dt.Rows.Add("Blouse", 75.00);
    dt.Rows.Add("Cap", 30.00);
    dt.Rows.Add("Pants", 50.00);
    dt.Rows.Add("Glasses", 15.00);

    bindingSource.DataSource = dt;

    dataGridView.DataSource = bindingSource;

    dataGridView.Columns.Add("colName", "Name");
    dataGridView.Columns.Add("colPrice", "Price");

    dataGridView.Columns["colName"].DataPropertyName = "Name";
    dataGridView.Columns["colPrice"].DataPropertyName = "Price";


    // And this prepares our ComboBox to enable us to select what column we want to filter:

    comboColumns.DataSource =
        new[]
        {
            new { Text = "Name", Value = "Name"},
            new { Text = "Price", Value = "Price"},
        };

    comboColumns.DisplayMember = "Text";
    comboColumns.ValueMember = "Value";
}


The above code fills a DataTable and tells the BindingSource that it's its DataSource, adds the Columns to our Grid and binds them to the correct data source columns.
It also adds the items that represent our columns to the ComboBox.


Now we declare the method that will receive every control's key events:

private void FilterAction(object sender, EventArgs e)
{
}


We set our events to that handler, inside our constructor (Could also be inside our Load event):

public FormTestGrid()
{
    InitializeComponent();

    comboColumns.SelectedValueChanged += new EventHandler(FilterAction);
    txtFilter.TextChanged += new EventHandler(FilterAction);
    chkFilter.CheckedChanged += new EventHandler(FilterAction);
}

The BindingSource component has a 'Filter' property which accepts SQL-Like Syntax constraints. For more information check the MSDN documentation on it.

And now we can write the method that will actually apply the filter, FilterAction.

private void FilterAction(object sender, EventArgs e)
{
    if (chkFilter.Checked)
    {
        bindingSource.Filter = string.Format("{0} like '%{1}%'", comboColumns.SelectedValue, txtFilter.Text);                
    }
    else
    {
        bindingSource.Filter = string.Empty;
    }
}


Notice that we use 'like' instead of '=' so that it doesn't have to be the exact same value to filter, but that's just for our example, you should decide what works better for you.


So this is it, just with those few lines of code, assigning three control's events to the same handler, we can implement our live filter to our Grid.

Thursday, February 24, 2011

Capture a Custom Control Event directly on the Web Page

This is actually something simple, but as it envolves delegates and events, it might be a little confusing to those who are not too familiar with it.


When to use it

Sometimes we'll want to change our page design or some control visibility or value according to user interaction, or some other event. That's pretty straightforward when everything we need belongs to our page. However, we could be expecting this 'trigger action' to come from a defined user control. Defined user controls are a group of controls and objects, also containing .NET code in a code-behind file that we develop so that we can use it in various places throughout our application. It follows the same purpose of a method, for example. If we have some control grouping that we'll need to use somewhere else, on another page, make it a defined user control.

When do I need to interact with the page?

There are lots of examples of when you'd want to change something on the page depending on something that is in the defined control. In this case we'll focus on events.
For my example, we'll have a defined control that lets our user chose a panel's backcolor. We must implement that on multiple pages, that's why we've made a user control for it.

How?

As you may already know, you can't see your user control's controls directly from your page, so you can't assign event handlers to their events. But we can expose that event by creating a public event directly on the user defined control.

First let's create our defined control:


<asp:Label runat="server" Text="Choose a background color:" ID="lblColor" />
<asp:DropDownList ID="dropColor" runat="server" AutoPostBack="True" OnSelectedIndexChanged="dropColor_SelectedIndexChanged">
    <asp:ListItem Text="Blue" Value="#0000FF" />
    <asp:ListItem Text="Red" Value="#FF0000" />
    <asp:ListItem Text="Green" Value="#00FF00" />
    <asp:ListItem Text="Yellow" Value="#FFFF00" />
</asp:DropDownList>

Notice that we've set property AutoPostBack on our DropDownList to true. That way we'll get a postback everytime the selected value changes.

And we'll declare a public event on our defined control code-behind:

public delegate void ColorSelectedDelegate(string value);
public event ColorSelectedDelegate ColorSelected;    

protected void dropColor_SelectedIndexChanged(object sender, EventArgs e)
{
    ColorSelected(dropColor.SelectedValue);
}

That way, when the user selects a color, the SelectedIndexChanged event will trigger our public custom event ColorSelected.

Here's our page design:

<%@ Register TagPrefix="usc" TagName="color" Src="~/BackColorControl.ascx" %>

<h1>Painting Class:</h1>
<form runat="server" id="form1">
    <table>
        <tr>
            <td align="right">
                <usc:color ID="uscColor" runat="server" OnColorSelected="PaintPanel" />
            </td>
            <td align="left">
                <asp:Panel ID="pnlPaint" runat="server" Width="100px" Height="100px" BorderColor="Black" BorderWidth="2px" />
            </td>
        </tr>
    </table>
</form>

You can see that we've set property "OnColorSelected='PaintPanel'" when we declared our defined control. That adds the method PaintPanel as a handler to that event. And we're passing the value of the color selected onto our page. So all we have to do next is actually paint the panel:

protected void PaintPanel(string value)
{
    pnlPaint.BackColor = System.Drawing.Color.FromName(value);
}


So, making it simple:

We have to declare a public event on our user defined control that will somehow expose the DropDownList's selected value. When we declare the user defined control on a page, we can add handlers to public events with property "On[Event's Name]". That way, we can get our selected value on the page, and apply it elsewhere, or do whatever we want.

Friday, January 21, 2011

Using BackgroundWorker Component

I'll probably start every next post with this...

In my own words:
The BackgroundWorker component is an easy way of using threading. It gives you some events so that you can easily control your execution flow (progress, cancellation, etc). And, as who knows a little bit of threading already knows, it manages to keep your UI responsive while performing lengthy and time consuming operations on the background. It is somewhat of a wrapper, so you can use threading and report the progress withouth even putting much thoughts on it...

In MSDN's words:
The BackgroundWorker class allows you to run an operation on a separate, dedicated thread. Time-consuming operations like downloads and database transactions can cause your user interface (UI) to seem as though it has stopped responding while they are running. When you want a responsive UI and you are faced with long delays associated with such operations, the BackgroundWorker class provides a convenient solution.


I'll use a simple form with a progress bar, two buttons and a BackgroundWorker, so the form will look like this:


Working the Worker

For this example, it's important to have the Asynchronous properties set to true, like the image below:


The properties' names are self-explanatory.

As for events, we have three of them:

  • DoWork:
    This is the main execution entry point. This is where you should put your asynchronous code, or your asynchronous entry method call.


  • ProgressChanged:
    This event does the progress reporting. If you want to report your progress on a progress bar, for example, this is where you should set its progress value.


  • RunWorkerCompleted:
    Self explanatory. Execution falls here right after work is completed, so that you can do any clean up, display any messages, etc.


  • Stating that, generate the event handlers:


    Properties:

    Code:


    To start running our example, we'll call method RunWorkerAsync inside Button Start's Click Event Handler:

    private void btnStart_Click(object sender, EventArgs e)
    {
        if (!backWorker.IsBusy)
        {
            backWorker.RunWorkerAsync();
        }
    }
    

    If you don't plan on disabling your start button or preventing the user from starting the operation again, you should put the check above. Property IsBusy returns us a boolean indicating if the BackgroundWorker is currently performing any background operation. If it is, and we call RunWorkerAsync again, it'll throw us an Exception of type InvalidOperationException with message "This BackgroundWorker is currently busy and cannot run multiple tasks concurrently.".

    Calling method RunWorkerAsync will execute whatever's inside the DoWork Event Handler, asynchronously. At this point, execution will already be in another thread.

    So let's put some dummy loop inside it just so it keeps looping for a while:

    private void backWorker_DoWork(object sender, DoWorkEventArgs e)
    {    
        for (int i = 1; i <= 100; i++)    
        {
            System.Threading.Thread.Sleep(500);
        }
    }
    

    Now assume that you want to report execution progress on that. The BackgroundWorker component gives us the method ReportProgress. We'll use the simple overload, which takes an integer value from 0 to 100 (0% to 100%), and raises the ProgressChanged event. Our code here will look like this:

    private void backWorker_DoWork(object sender, DoWorkEventArgs e)
    {
        for (int i = 1; i <= 100; i++)
        {
            System.Threading.Thread.Sleep(500);
            backWorker.ReportProgress(i); // Don't forget that i represents a percentage from 0 to 100.
        }
    }
    

    And inside the Event Handler ProgressChanged, we'll set the progress bar's value to the value that we passed as a parameter when we called the method ReportProgress:

    private void backWorker_ProgressChanged(object sender, ProgressChangedEventArgs e)
    {
        progressBar.Value = e.ProgressPercentage; // Percentage value comes on ProgressChangedEventArgs
    }
    

    If we run our project here, we'll see the progress of execution on the progress bar. But what if we want to cancel it?BackgroundWorker has a readonly property named CancellationPending, and a method named CancelAsync. As you could already figure out, when we want to cancel an asynchronous operation, we call method CancelAsync and it'll set the CancellationPending property to true. We can then check if it's true everytime we reach a point in our code where we can actually cancel the operation.Call CancelAsync inside Button Cancel's Click Event Handler:

    private void btnCancel_Click(object sender, EventArgs e)
    {
        backWorker.CancelAsync();
    }
    

    Check the property CancellationPending on every iteration on our loop:

    private void backWorker_DoWork(object sender, DoWorkEventArgs e)
    {
        for (int i = 1; i <= 100; i++)
        {
            if (backWorker.CancellationPending)
            {
                e.Cancel = true; // Here we're letting the Worker know that we're cancelling our operation
                return;
            }
            else
            {
                System.Threading.Thread.Sleep(500);
                backWorker.ReportProgress(i);
            }
        }
    }
    

    Notice that we set a property on DoEventArgs to true. We do that to indicate that the operation has been canceled when execution reaches our next event handler, RunWorkerCompleted. As we call return, execution will leave DoWork and fall into RunWorkerCompleted, where we can display any messages, or do some cleanup:

    private void backWorker_RunWorkerCompleted(object sender, RunWorkerCompletedEventArgs e)
    {
        if (e.Cancelled) // Remember that we've indicated cancellation on DoWork?
            MessageBox.Show("User cancelled execution");
        else
            MessageBox.Show("Execution completed successfully");
    }
    

    So that's basically it. This is a simple way of using BackgroundWorker, just to show you how powerful it is. It literally simplifies using threading. Hope you like it.

    Friday, January 7, 2011

    Using Isolated Storage

    Once again, first we have to understand what it is and how it works.

    In my own words:
    It is a folder in Windows' File System where you can securely store data for your applications. You would, for example, want to store data in Isolated Storage for a small application which you don't want to have to use a Database, or a .config file. In addition to that, the user won't see the data being stored, it won't ask for any permission or anything like that. Another great thing is that Isolated Storage can be divided by machine's users, which means that each user will have their own configuration for your application. It can also be divided by users and applications, or by users and assemblies.

    In MSDN's words:
    Isolated storage is a data storage mechanism that provides isolation and safety by defining standardized ways of associating code with saved data. Standardization provides other benefits as well. Administrators can use tools designed to manipulate isolated storage to configure file storage space, set security policies, and delete unused data. With isolated storage, your code no longer needs unique paths to specify safe locations in the file system, and data is protected from other applications that only have isolated storage access. Hard-coded information that indicates where an application's storage area is located is unnecessary.


    That pretty much covers it. Following what I said, let us declare a configuration class and serialize it to the Isolated Storage. Here's our configuration class:

    [Serializable] // This is not really needed for XML Serialization: it will serialize without it
    public class Config
    {
        public string InitialDirectory { get; set; }
        public bool StartActivated { get; set; }
        public string WarningMessage { get; set; }
        public int ExpireTime { get; set; }
    }
    

    I am assuming we will serialize all of its members.

    Working with Isolated Storage is pretty straight-forward. The two key classes are IsolatedStorageFile which represents the Isolated Storage and IsolatedStorageFileStream, which is literally a stream.
    Using both of them, with the following code we can serialize our Config class to Isolated Storage, as a XML:

    using System.IO;
    using System.IO.IsolatedStorage;
    using System.Xml.Serialization;
    
    
    // First we fill our config fields:
    Config config = new Config();
    config.InitialDirectory = @"C:\Temp";
    config.StartActivated = true;
    config.WarningMessage = "Don't do that again!";
    config.ExpireTime = 90;
    
    // Now let's get a reference to the Isolated Storage:
    IsolatedStorageFile isolatedStorageFile = IsolatedStorageFile.GetUserStoreForApplication(); // You may get an exception here, I'll talk about it below
    isolatedStorageFile.CreateDirectory("MyDir"); // If you will
    
    // Our Stream to Isolated Storage:
    IsolatedStorageFileStream isolatedStream = new IsolatedStorageFileStream(@"MyDir\config.xml", FileMode.OpenOrCreate, isolatedStorageFile); // Pass FileMode as OpenOrCreate so you won't get an exception if the file already exists, nor will you have to check for it
    
    
    // Serializing it:
    XmlSerializer xmlSerializer = new XmlSerializer(typeof(Config));
    
    xmlSerializer.Serialize(isolatedStream, config);
    
    // Now flush our Isolated Stream:
    isolatedStream.Flush();
    isolatedStream.Dispose();


    So you have your Application's Configurations serialized to Isolated Storage, divided by user.
    This way you can deserialize it and apply it to your application, like this:

    using System.IO;
    using System.IO.IsolatedStorage;
    using System.Xml.Serialization;
    
    IsolatedStorageFile isolatedStorageFile = IsolatedStorageFile.GetUserStoreForApplication();
    IsolatedStorageFileStream isolatedStreamOpen = new IsolatedStorageFileStream(@"MyDir\config.xml", FileMode.Open, isolatedStorageFile); // Here FileMode has to be Open
    XmlSerializer xmlSerializer = new XmlSerializer(typeof(Config));
    
    Config config = (Config)xmlSerializer.Deserialize(isolatedStreamOpen);
    
    // Then you can distribute your configurations across  your application


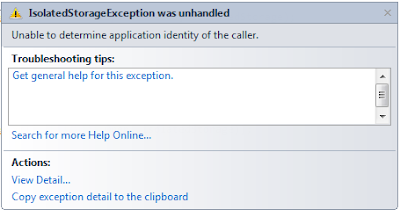
    About that exception I said you might get, exception of type IsolatedStorageException, with message "Unable to determine application identity of the caller.". This means that your application is not enabled for ClickOnce security settings. This allows your application to use Isolated Storage, and some other stuff.

    Editing: If you plan on running your application as a simple .exe file, without having to install it, the method GetUserStoreForApplication() won't be good. It only 'lets' you access Isolated Storage after the application is deployed, installed, and not as a single .exe file. It WILL work if you run it through Visual Studio though. So be careful here. As an alternative, use method GetUserStoreForDomain().


    To activate ClickOnce Security Settings, do this:
    • Right click your project, and select Properties
    • Go to the security tab
    • Check the option "Enable ClickOnce Security Settings"

    Doing this prevents the exception from happening.

    Again, hope it helps.